
What to Set Up First in Dubsado
After you get your branding and login set up, the next order of business is connecting your payment processor, email account, and calendar! These settings are essential if you want to take full advantage of everything Dubsado can do for your business.
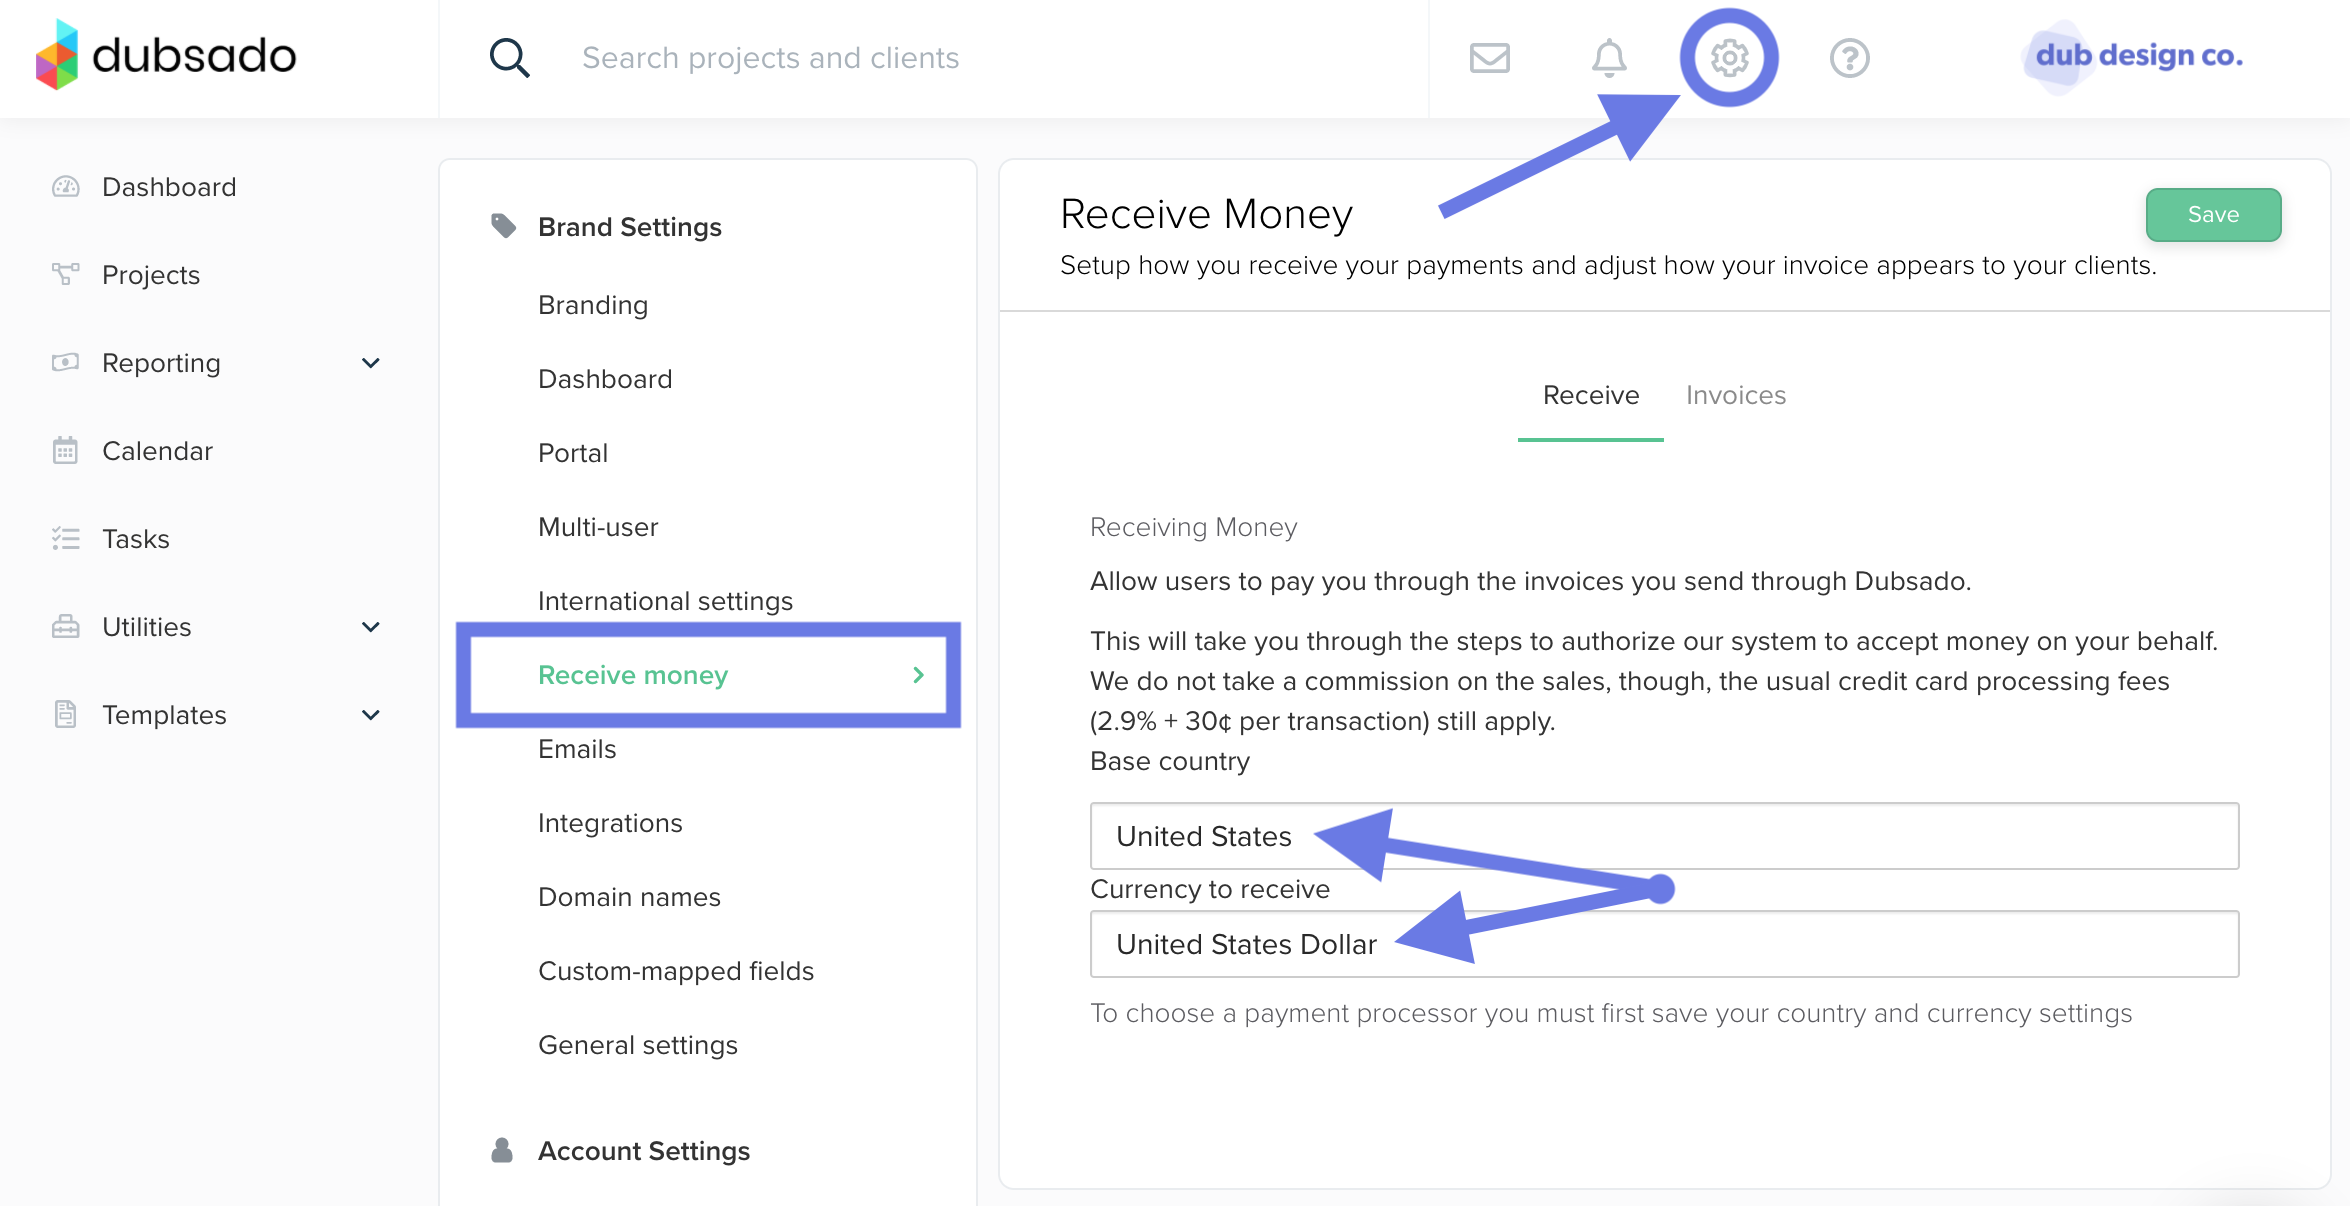
Receive money
The Receive Money tab in the settings is where you will connect your payment processor. A payment processor allows your clients to pay you right on the invoices you send from Dubsado!
First, select your country and currency:
Next, connect your processor. Dubsado connects with Stripe, Square, and PayPal:
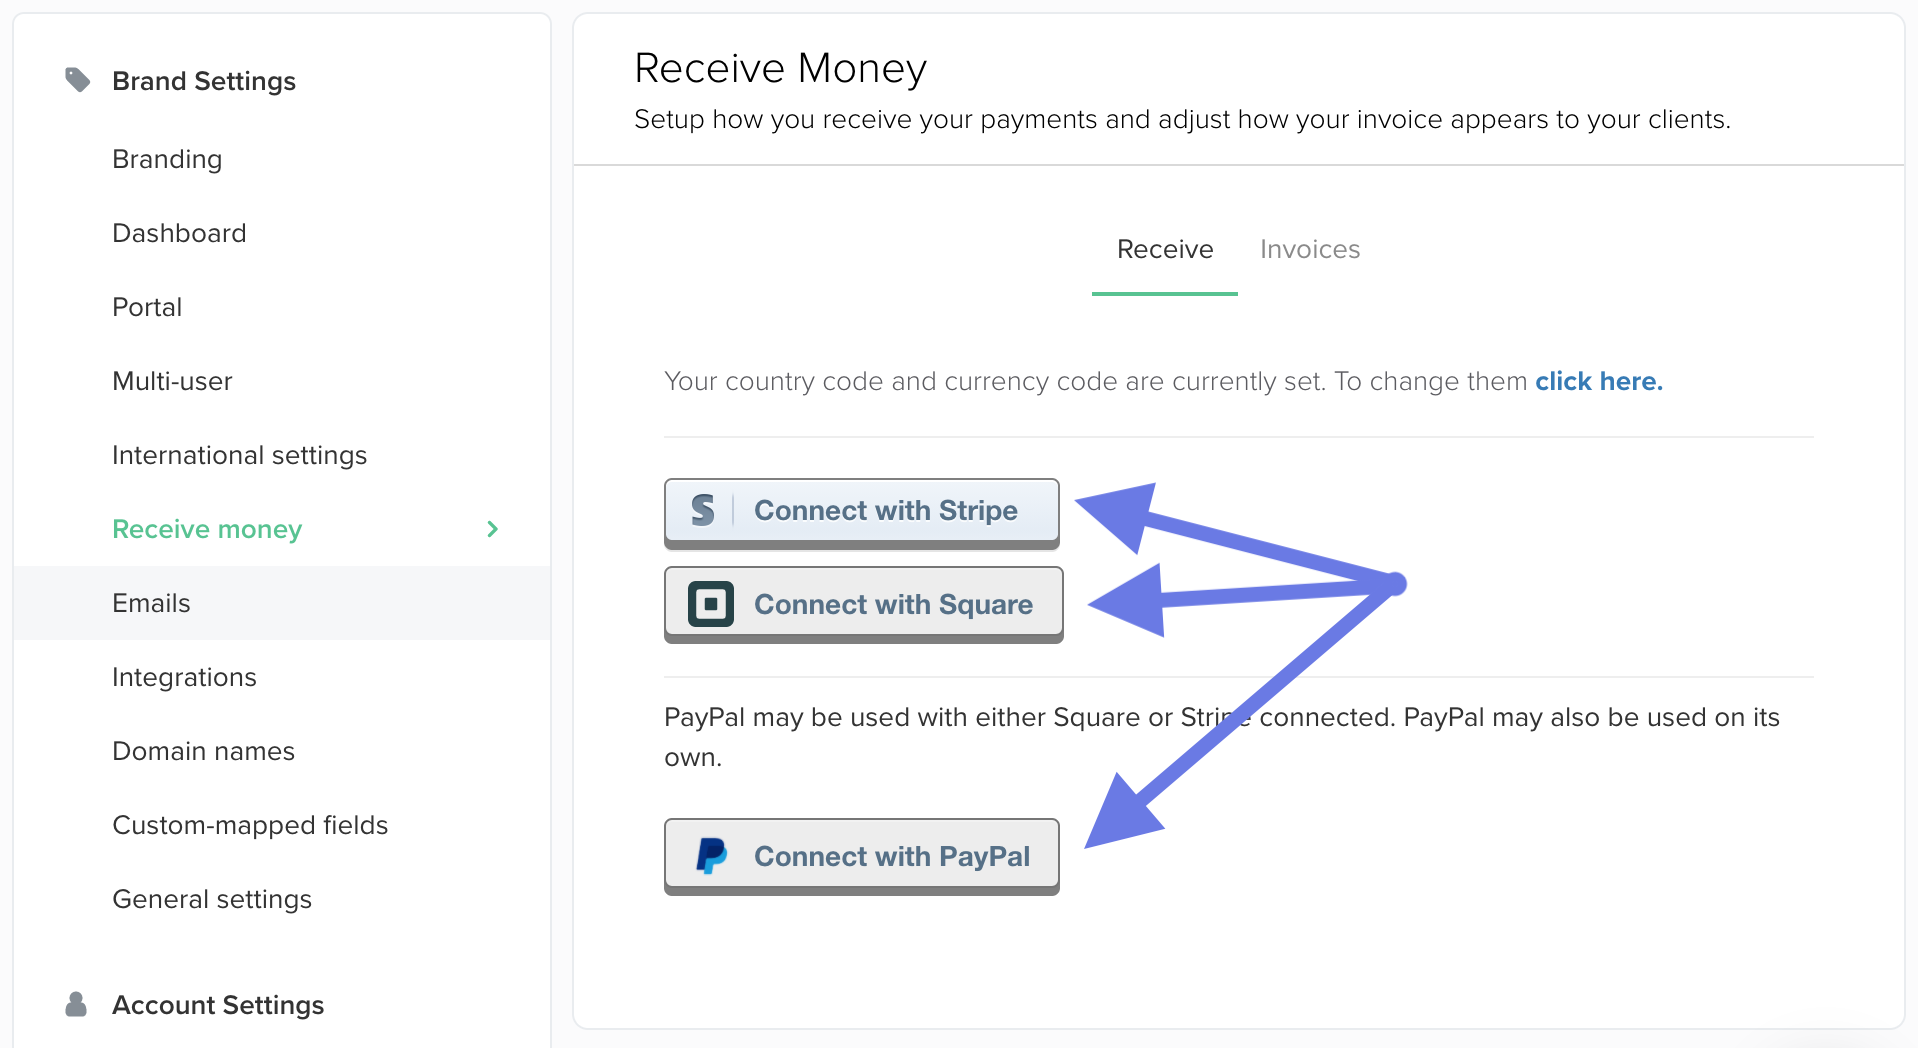
Log out of your existing payment processor account.
Click on the Connect with... button for the processor you'd like to connect.
Follow the onscreen instructions to grant access to your account.
👋 Here's a tip... connecting a payment processor will give you more options for automation. Dubsado does not take any additional fees on top of the payment processor!
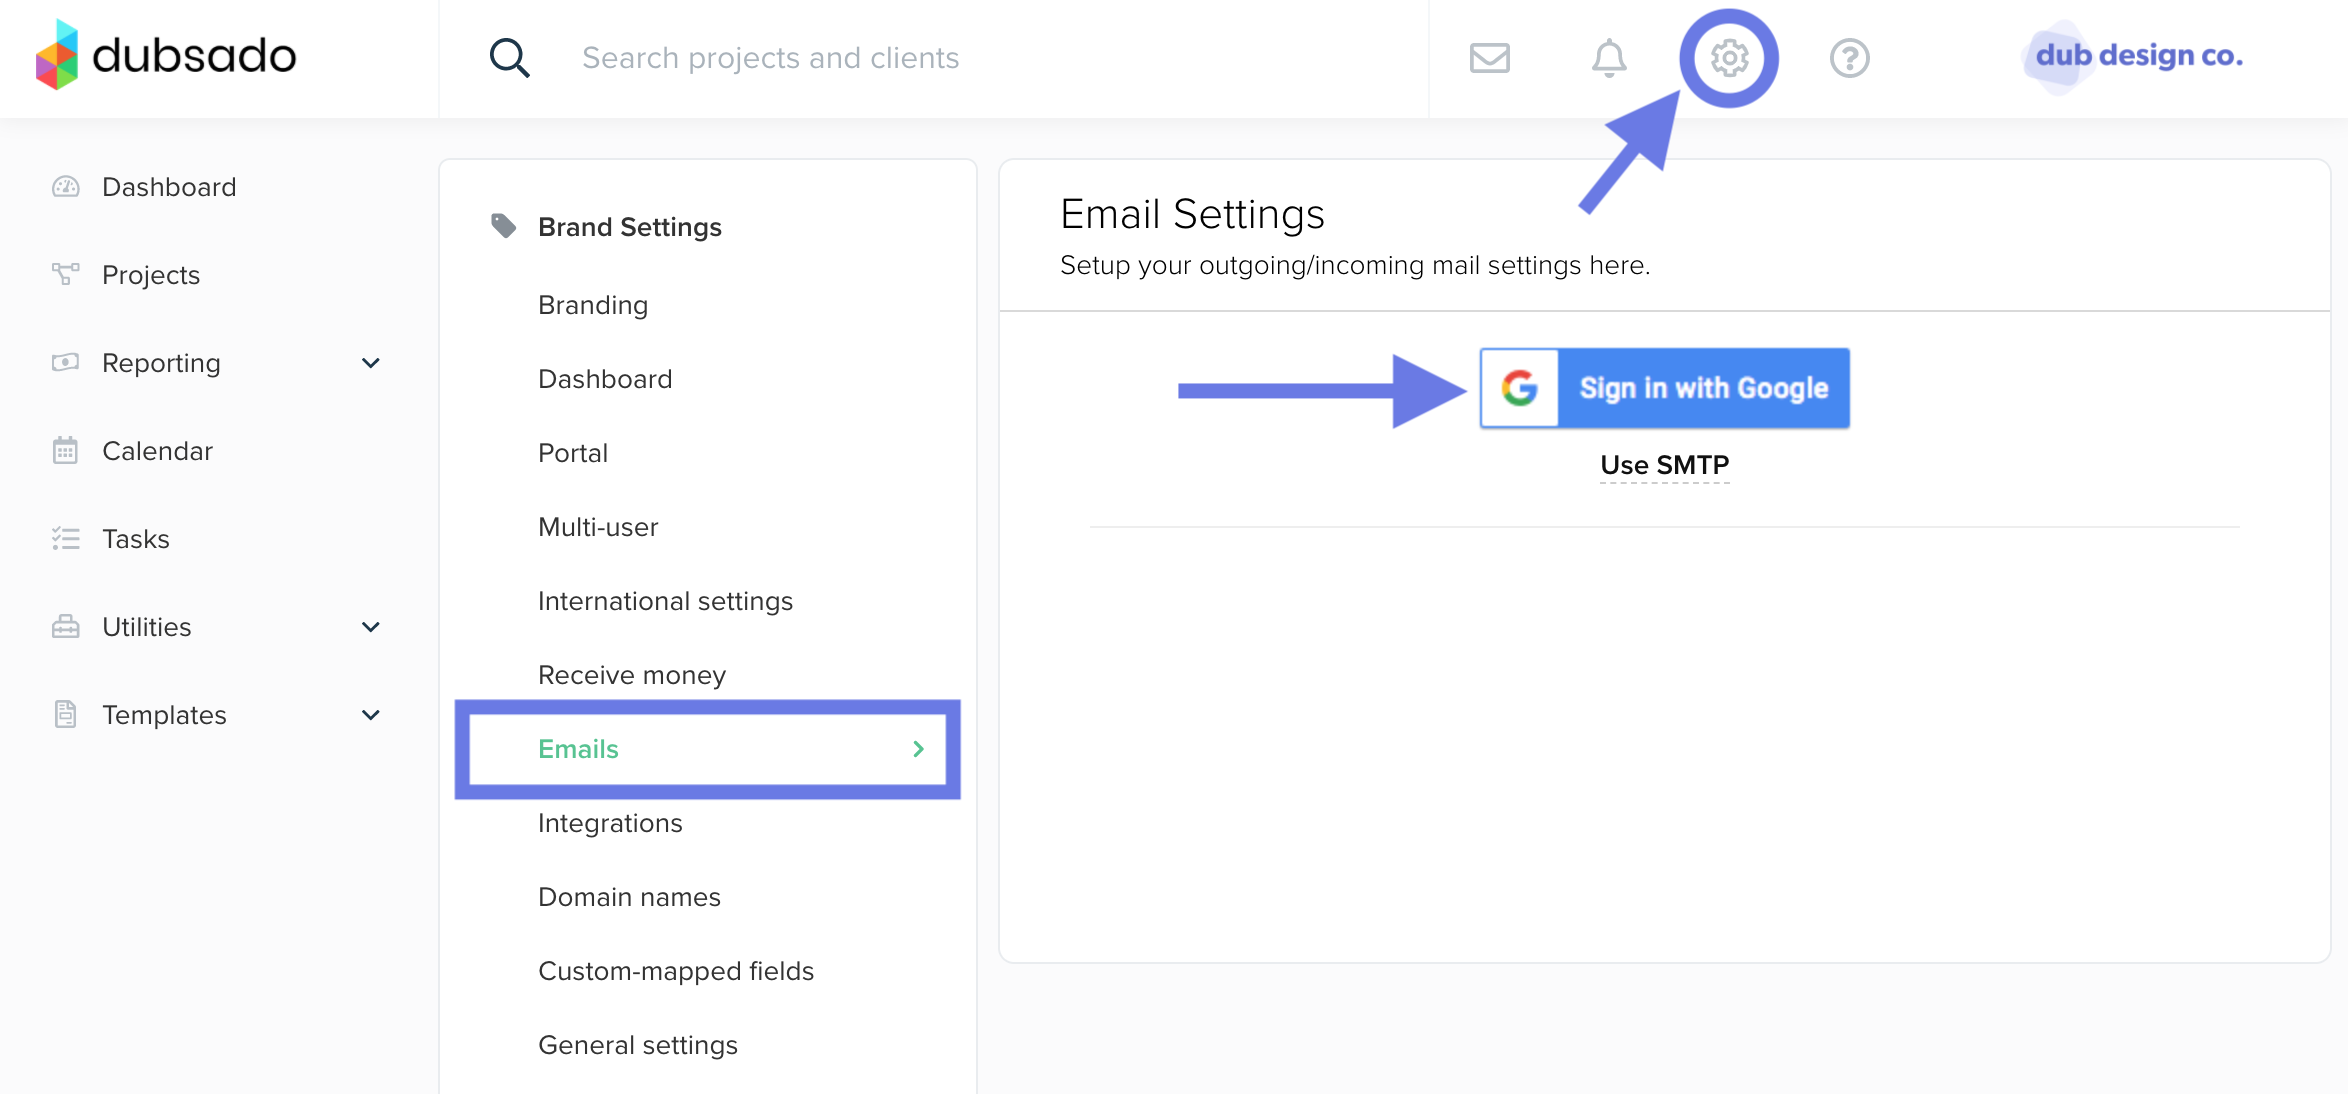
Emails
The Emails tab in the settings is where you will connect your email account so that outgoing email sent from Dubsado will come from your email address. Replies from clients can also be brought into Dubsado so that you'll have a record of communication.
👋 Here's a tip... we limit the number of emails you can send per day if you don't have an email account connected. The emails are also more likely to go to spam!
Gmail and Google Workspace (G Suite) accounts
If you have Gmail or a Google Workspace account for your custom email address, this is a one-step process. Just click the blue Sign in with Google button to sign into Google and connect your account. You’re all set for both outgoing and incoming client emails!
All other email providers
If you do not sign into your email with Google, there are a couple more steps.
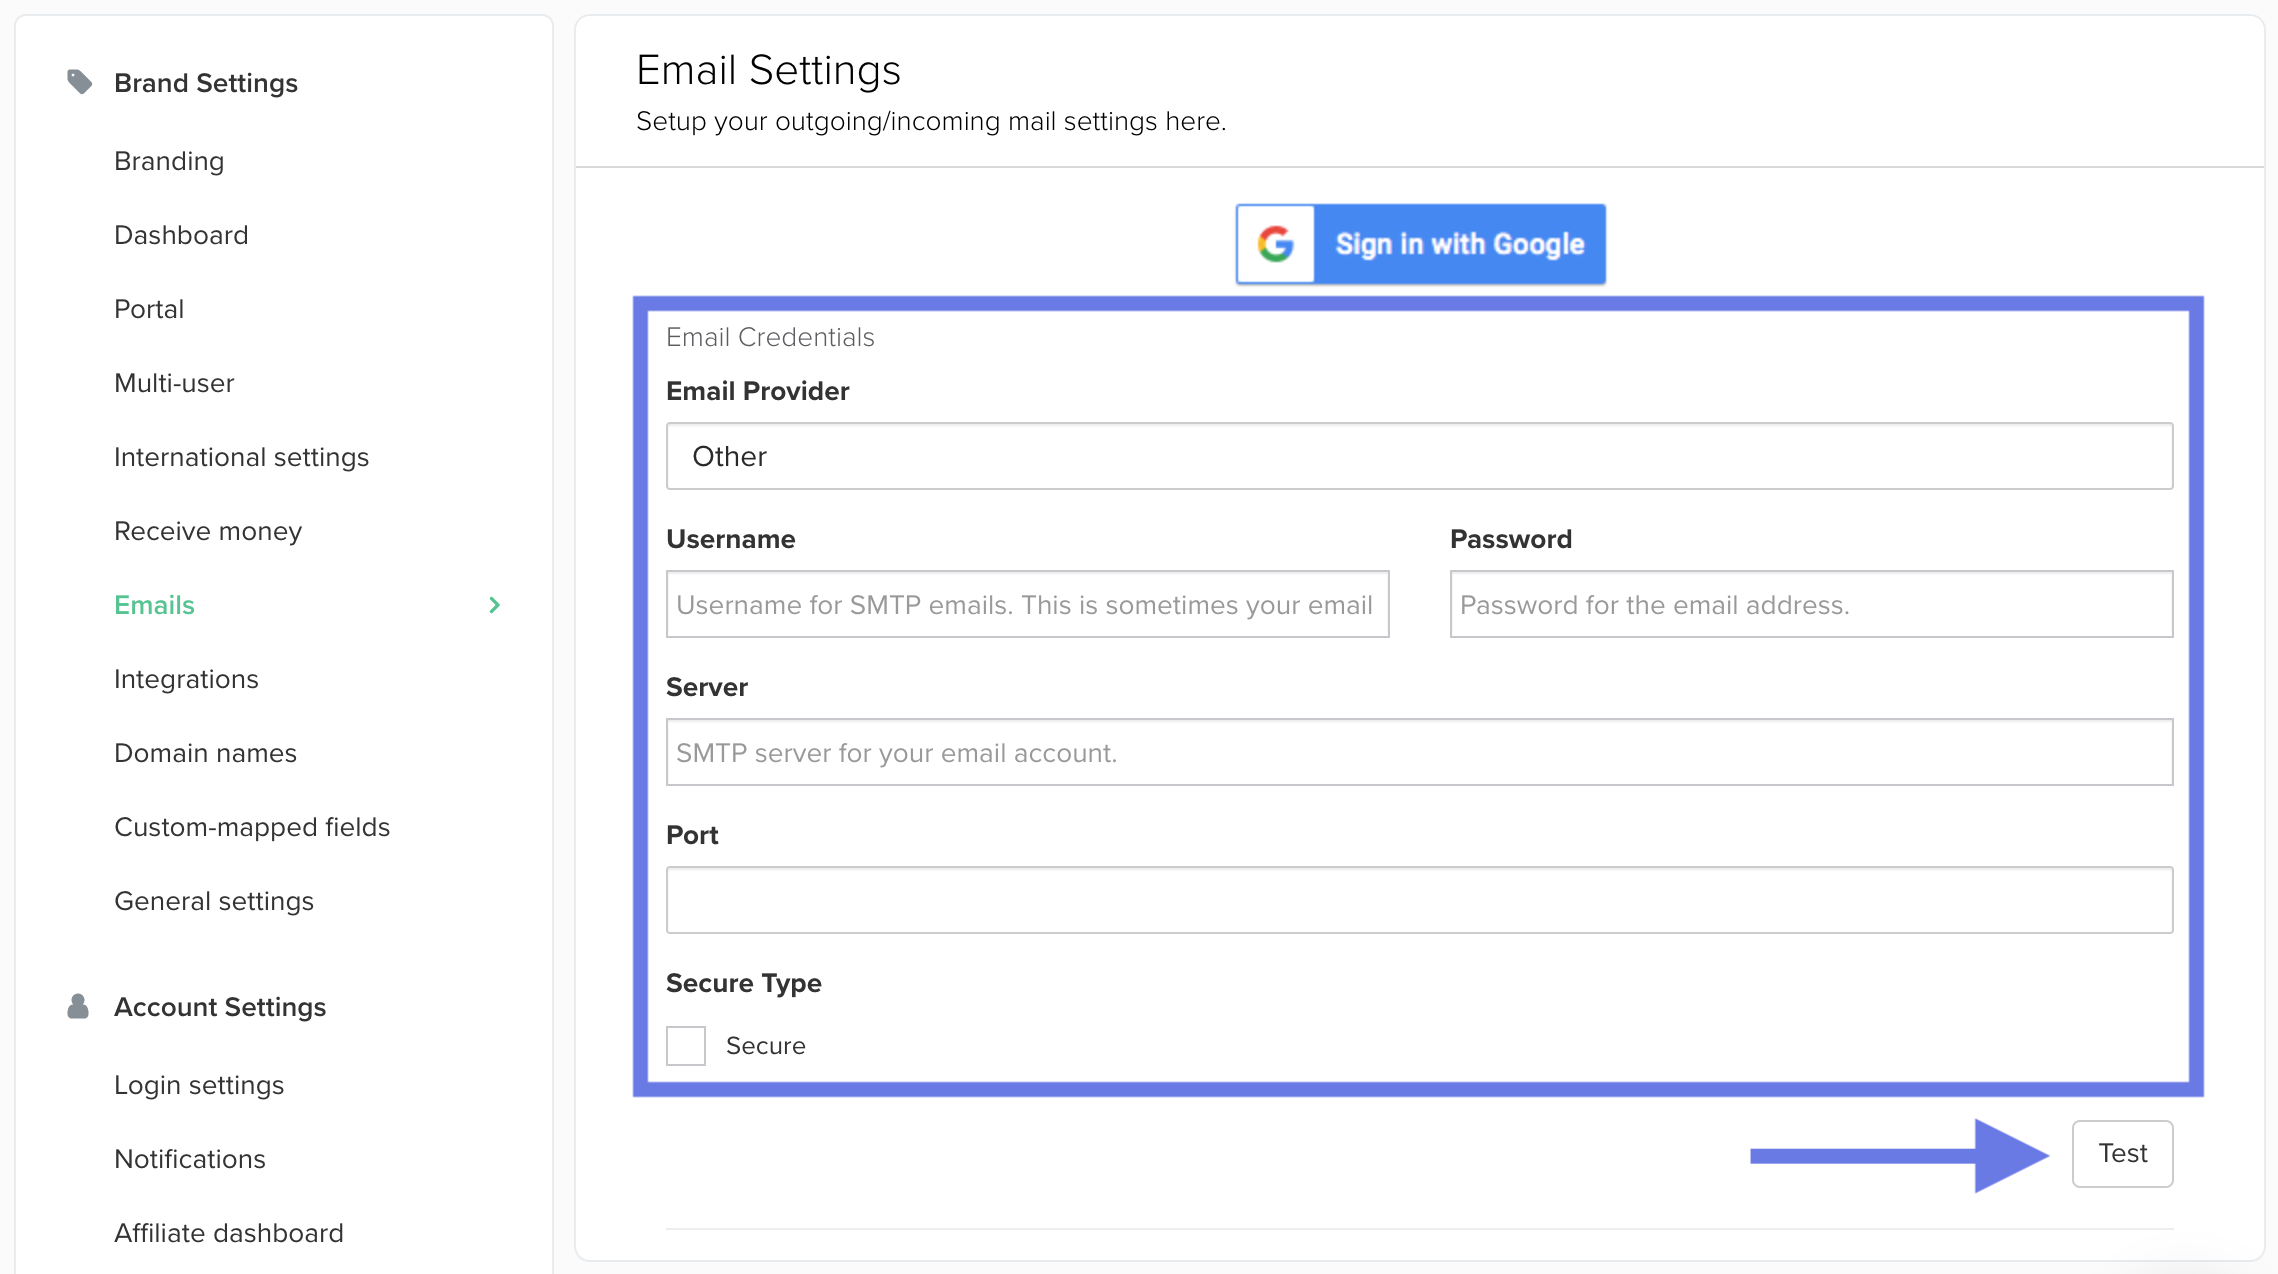
Click Use SMTP.
Select your Email Provider.
Enter the requested information. Reach out to your email provider if you need your outgoing server (SMTP) settings.
Click Test.
👋 Here's a tip... some email providers, like iCloud and Outlook, require you to create and use an app-specific password. If your login credentials fail, check with your email provider to see if this is the case!
Once the outgoing email settings are verified, you can set up the forwarding settings for incoming emails.
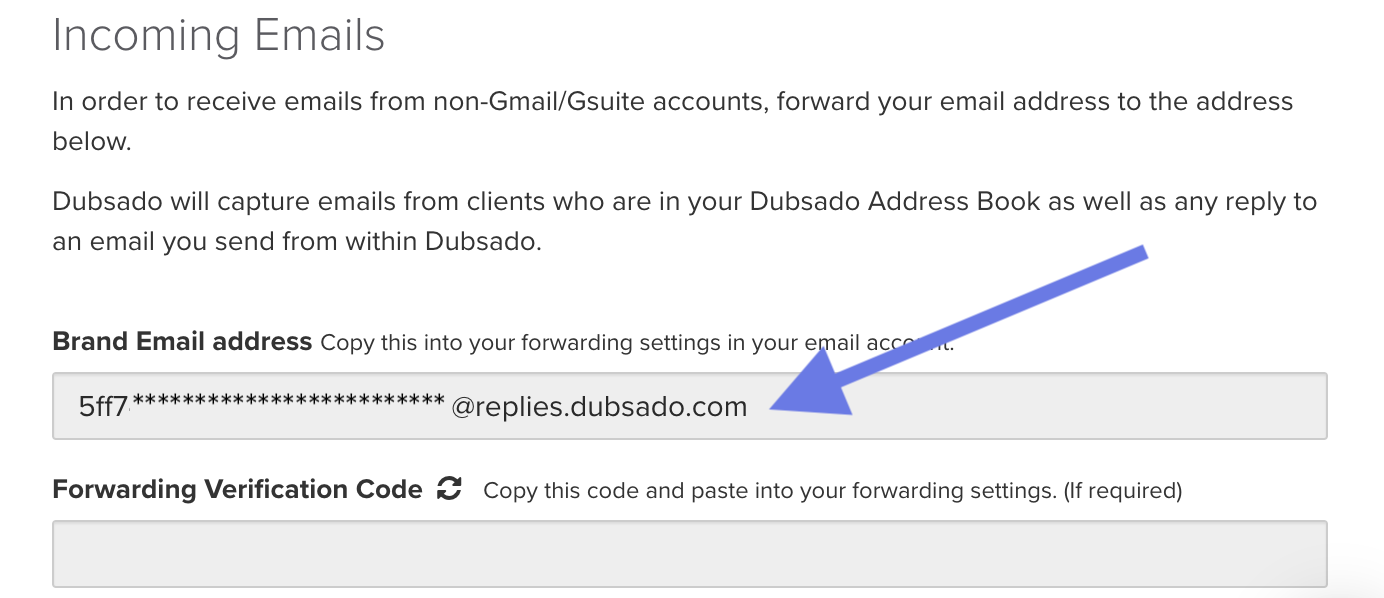
Copy the Brand Email address shown.
Locate the forwarding settings for your email provider.
Paste the brand email address into the forwarding address of your email provider.
If you see one, turn on the option to keep copies of emails in your regular inbox.
Most providers do NOT require a Forwarding Verification Code, but you can generate one if needed.
Save your forwarding settings.
👋 Here's a tip... if you're having difficulty, check out our email troubleshooting articles or send us a chat!
Calendar Settings
Connecting a calendar account to Dubsado will:
allow you to see events from your external calendar in Dubsado
show Dubsado-created events, like scheduled appointments, tasks with due dates, and projects, on your external calendar
enable the Dubsado scheduler to read events on your external calendar and automatically block off your availability when there is a conflict
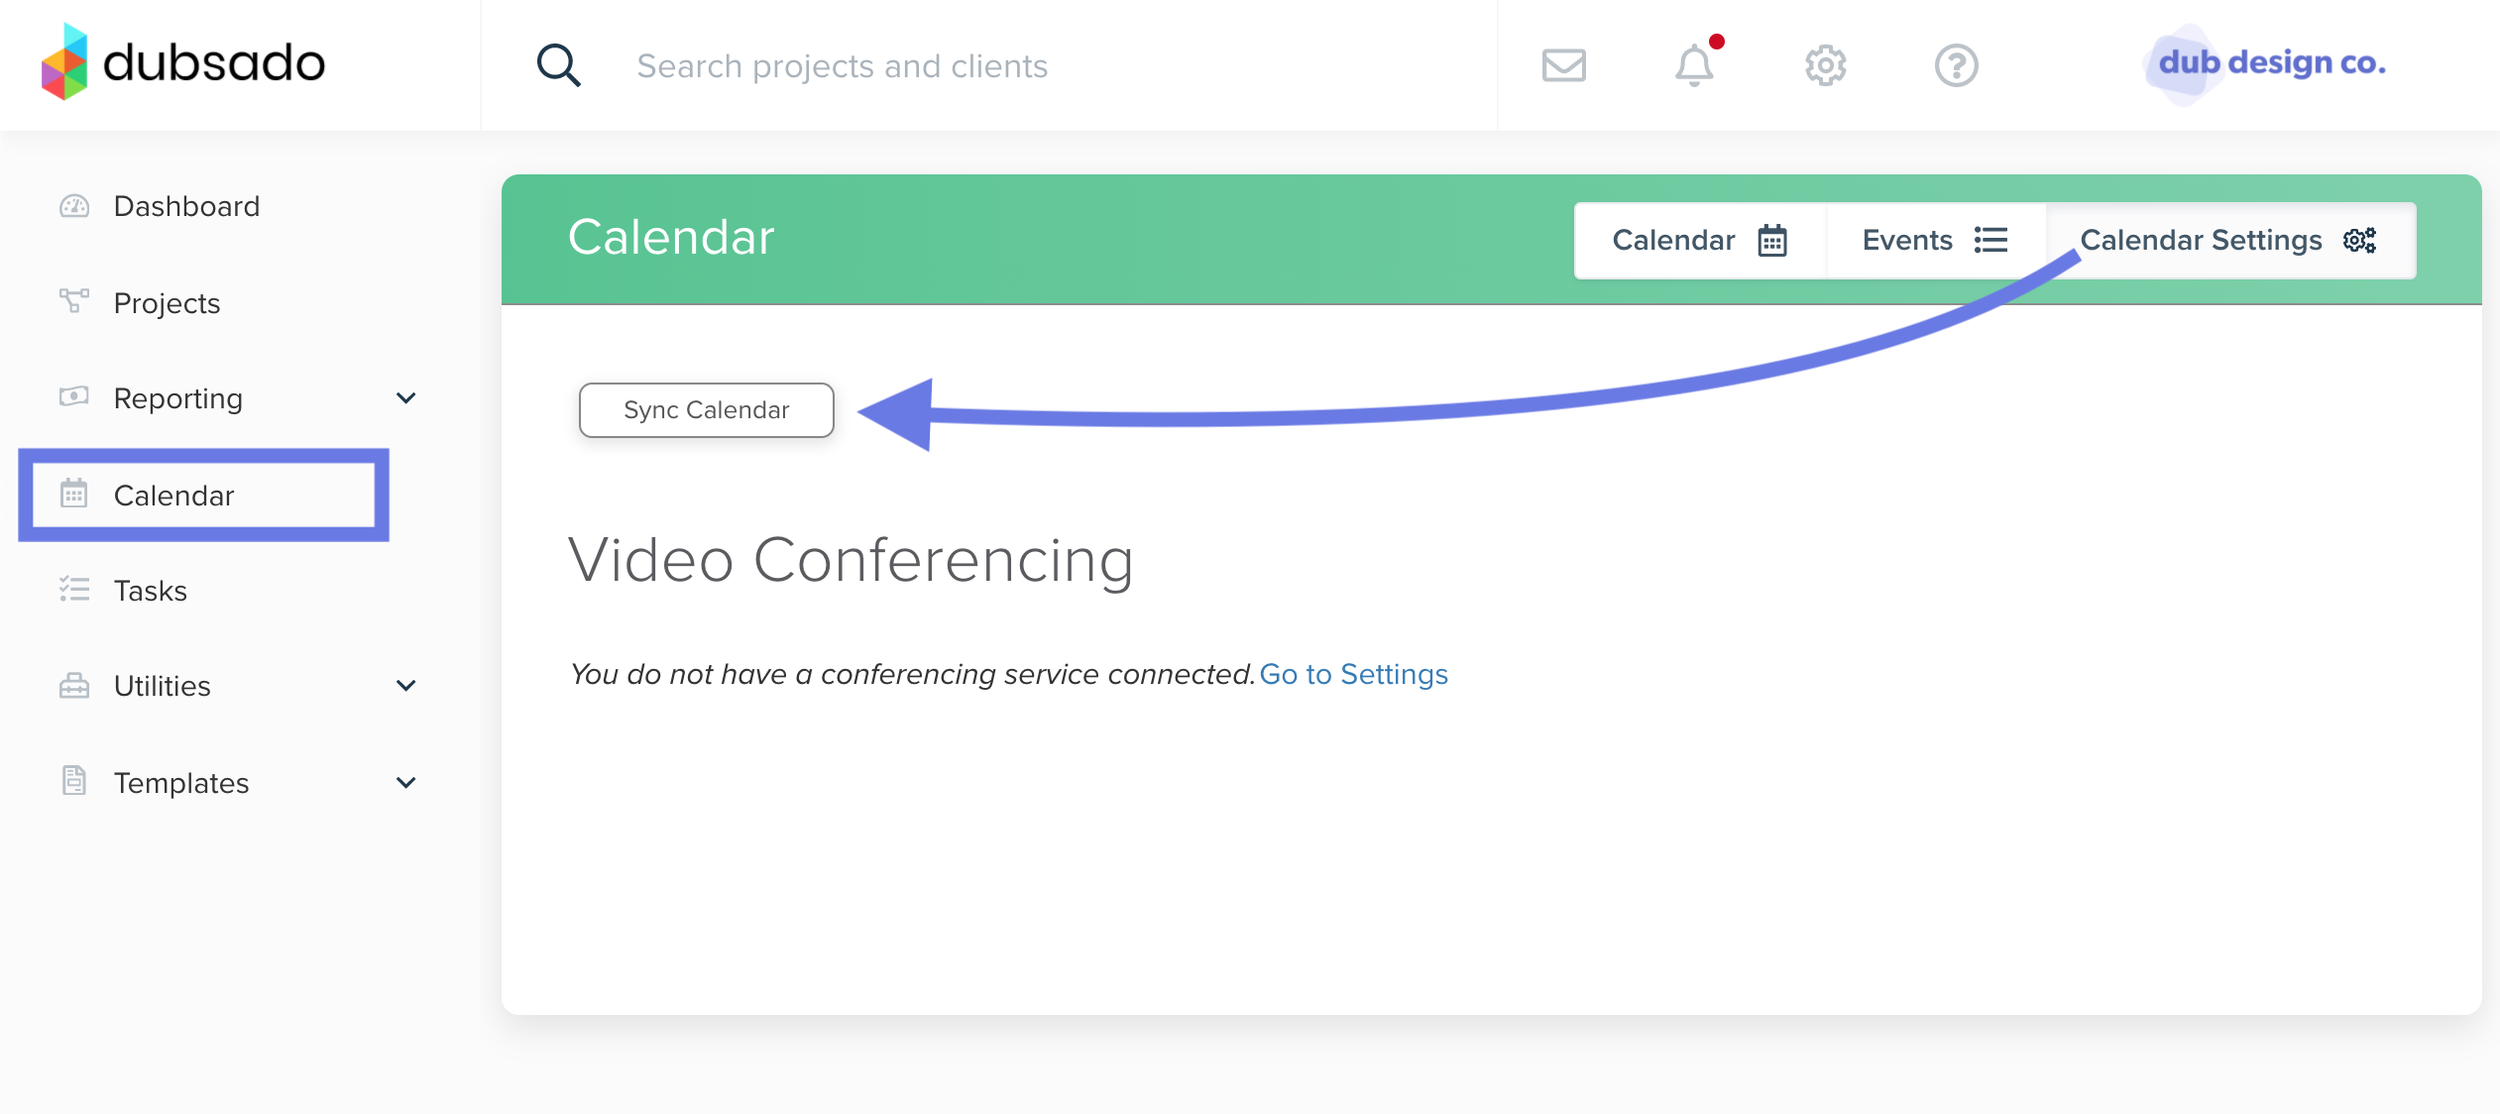
Go to Calendar in the main menu.
Click Calendar Settings in the upper right corner.
Click Sync Calendar.
Select your calendar account provider in the new tab that opens and follow the sign in process to get connected.
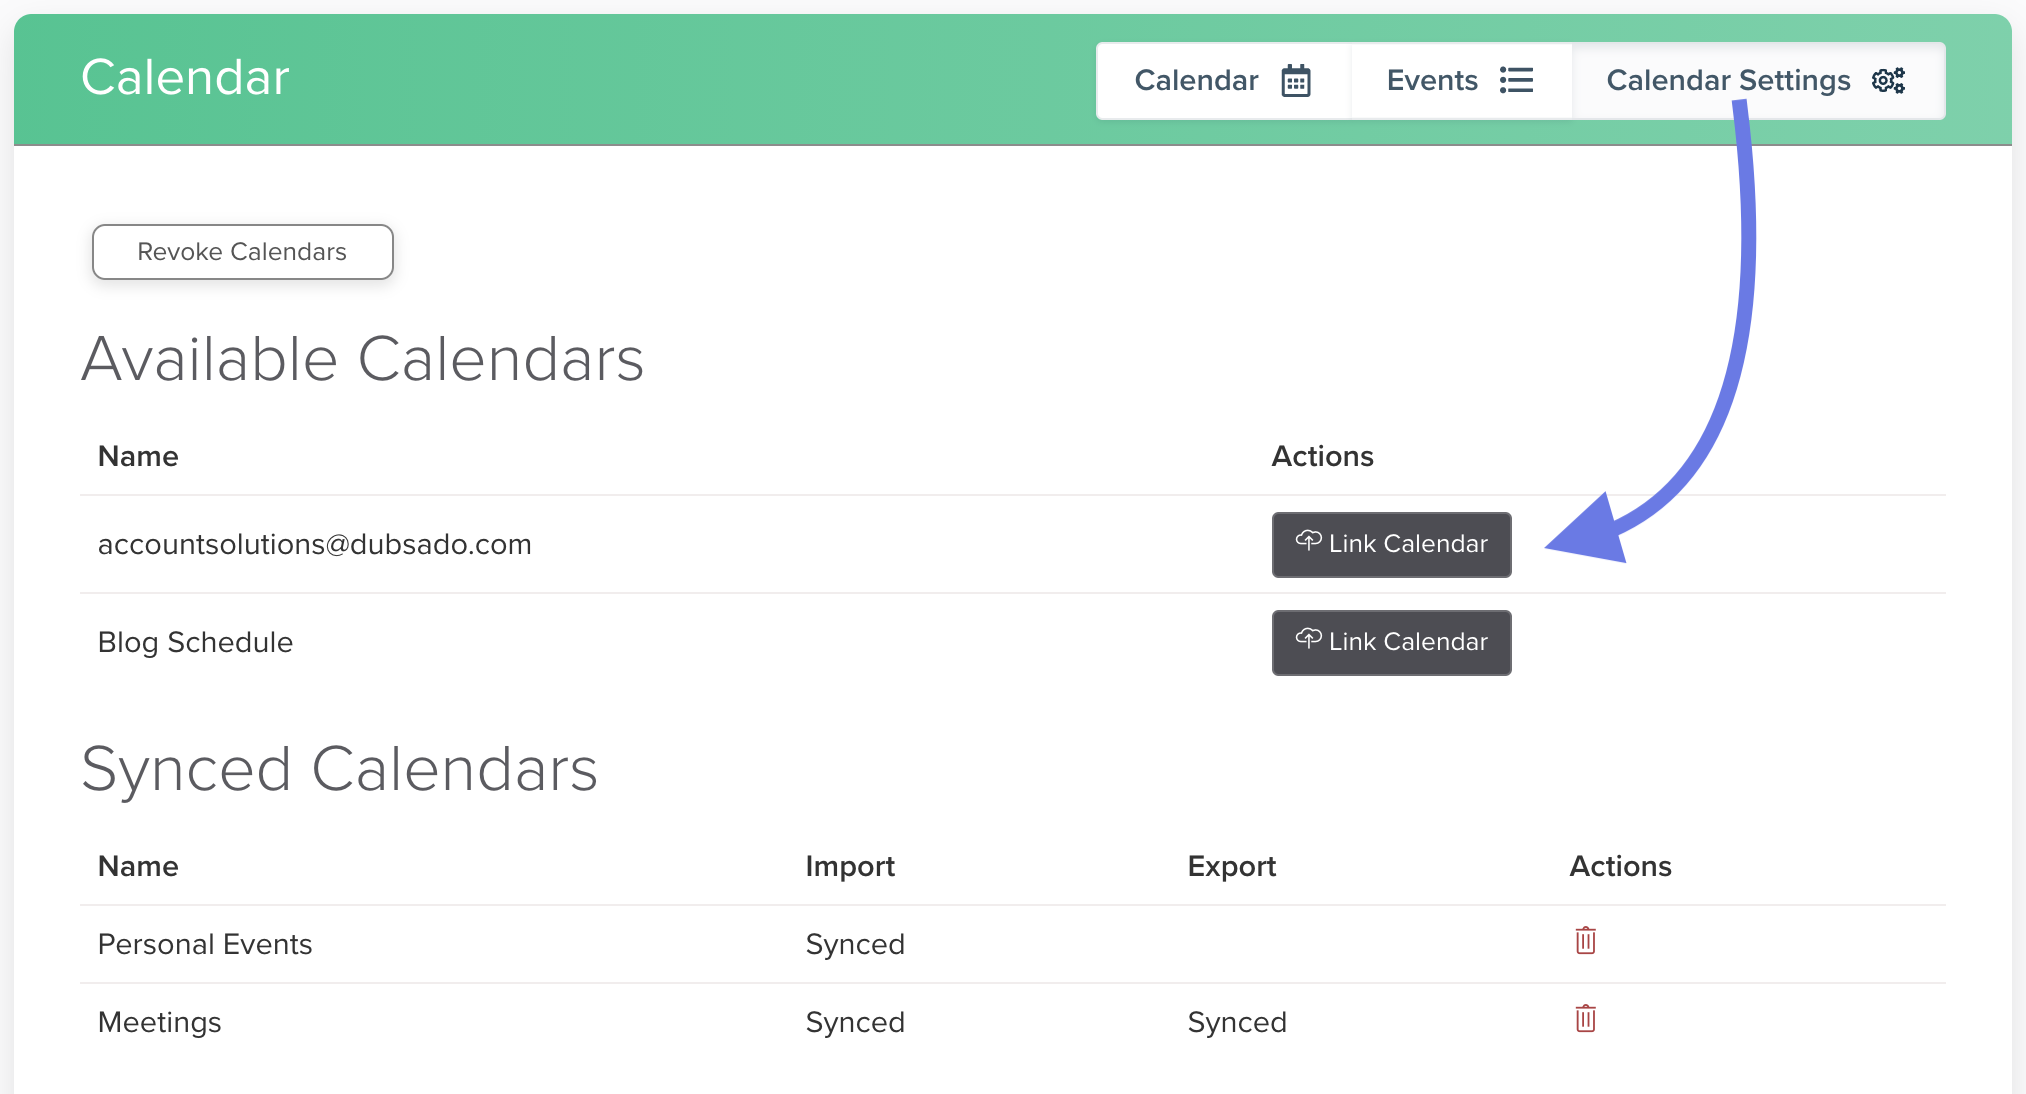
After the Dubsado calendar reloads, click Calendar Settings.
Link calendars from your account and adjust the import and export settings (see below).
👋 Here's a tip... some providers, such as Apple, will require you to have an app-specific password to connect. If you can't sign into your calendar account, you may need to set up an app-specific password through your calendar provider.
To finish configuring your calendar connection, click Link Calendar next to each calendar you want to sync with Dubsado.
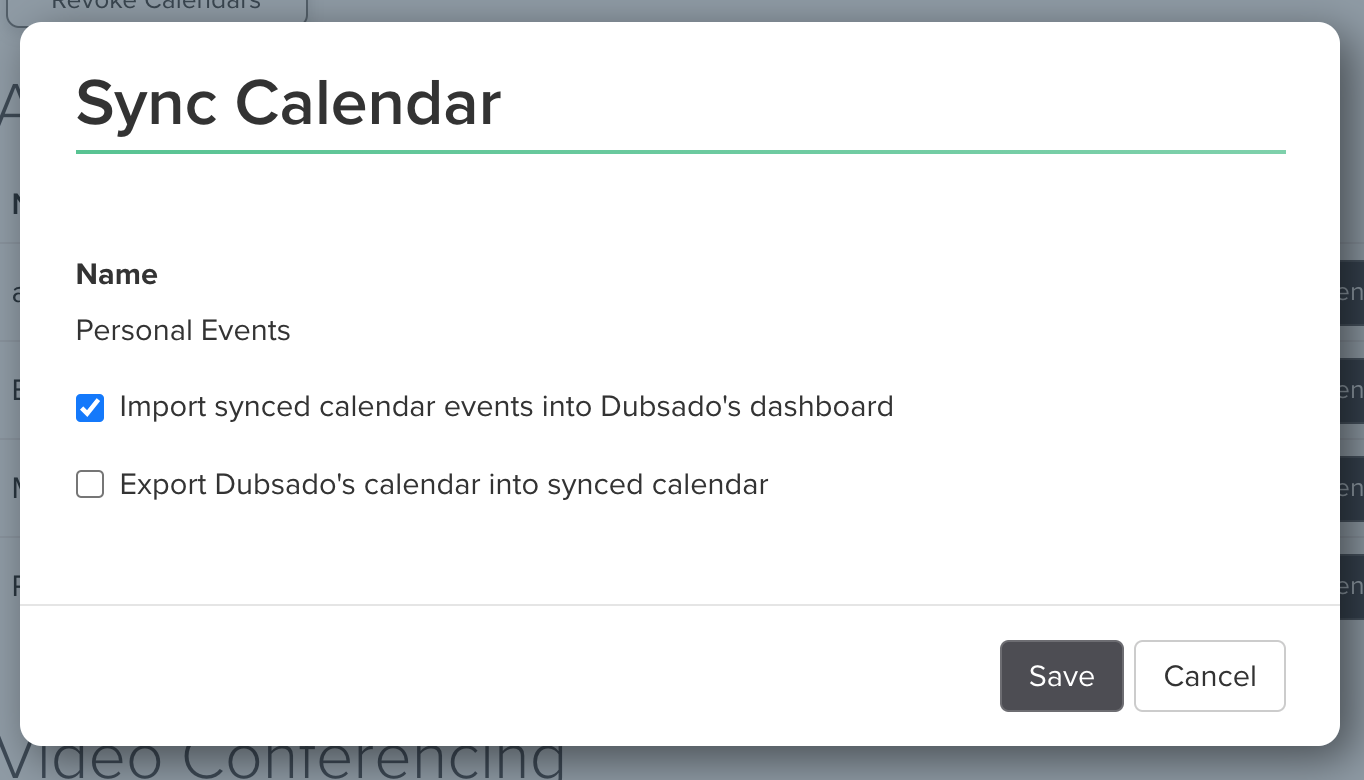
For each calendar you link, check the boxes to:
import that calendar’s events into Dubsado
export all Dubsado events to that calendar
both import and export
Once you link an available calendar, it will appear under Synced Calendars. You can click on a synced calendar to adjust its import and export settings.
⚠️ Heads up! We recommend turning export on for only one calendar, otherwise you'll see duplicate events. For more information on connecting your calendar, check out this article.
Bonus: International Settings
Review the International Settings tab, especially if you are not based in the United States. Verify that your locale and time zone are correct here.